...
Features | Description | Screenshots | Information icons | Information icon screenshots |
|---|---|---|---|---|
Set up OAuth | Click the “SSI OAuth“ tab of the main menu. | 9. To set up SSI OAuth click the “Edit“ button and follow the instructions. | ||
Click the “Edit“ button. The “Edit“ page will appear. | 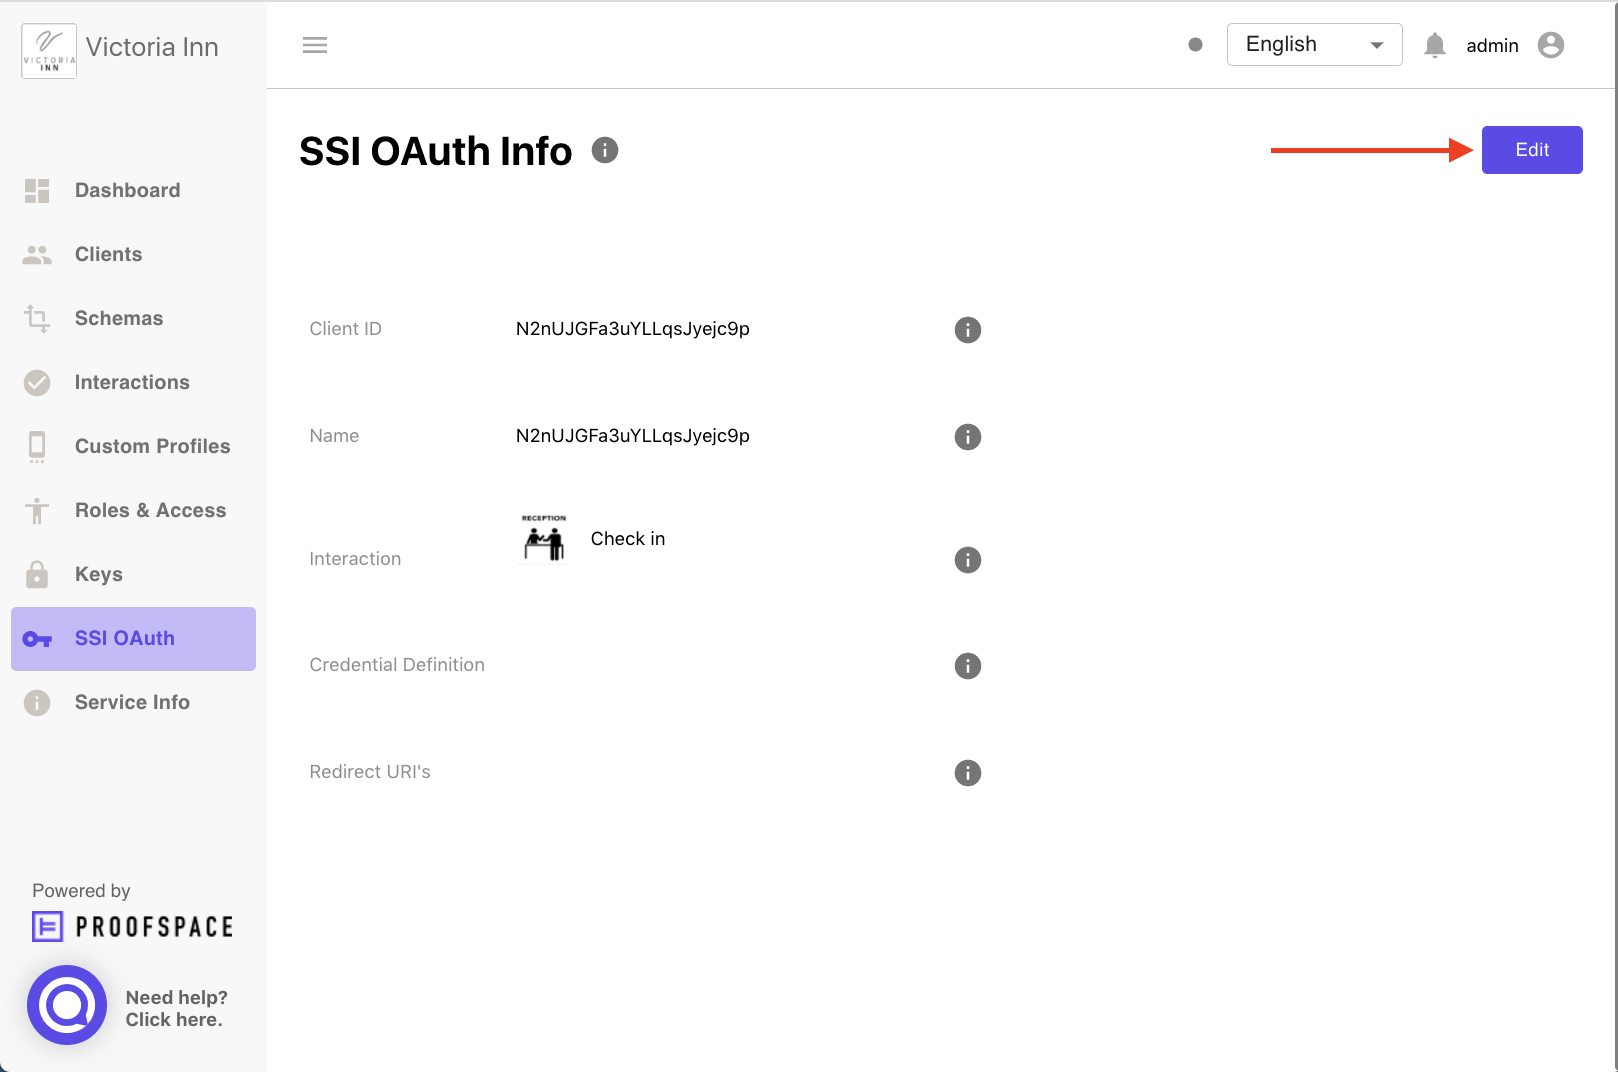 The authorisation service identifier (service DID) is stored automatically. The authorisation service identifier (service DID) is stored automatically. |  | ||
In the "Client ID" field, the authorization service identifier (service DID) is stored automatically. |  | 2. Fill this field with the service DID. |  | |
Name | Fill the “Name“ field with the service DID.3. Select the interaction from the drop-down list. This list includes interactions that require self-attested credentials pre-filled from QR codes. | |||
Select Interaction | Select the interaction from the drop-down list. This list includes interactions that require self-attested credentials pre-filled from QR codes. | 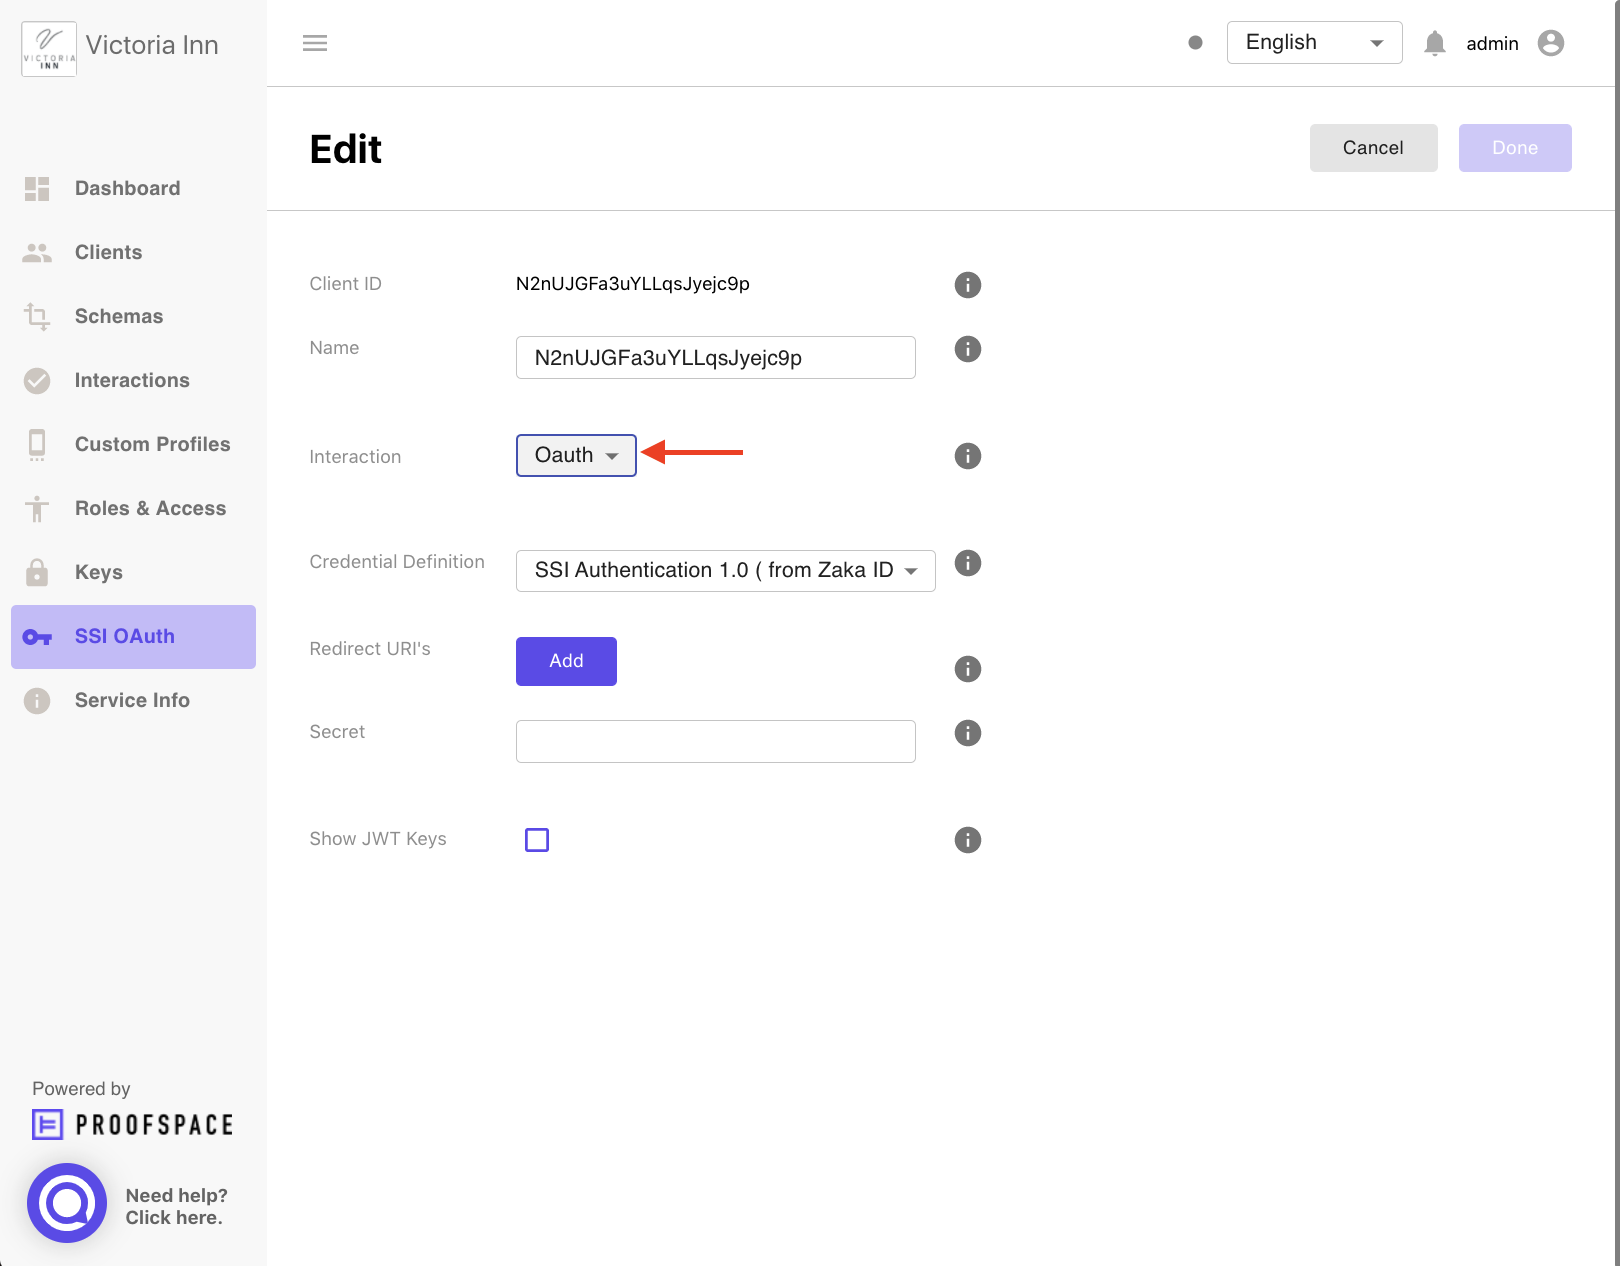 | ||
4. Select a credential definition from the drop-down list (only credential definitions for self-attested credentials pre-filled from QR codes are available).Select Credential Definition | Select a credential definition from the drop-down list (only credential definitions for self-attested credentials pre-filled from QR codes are available). | 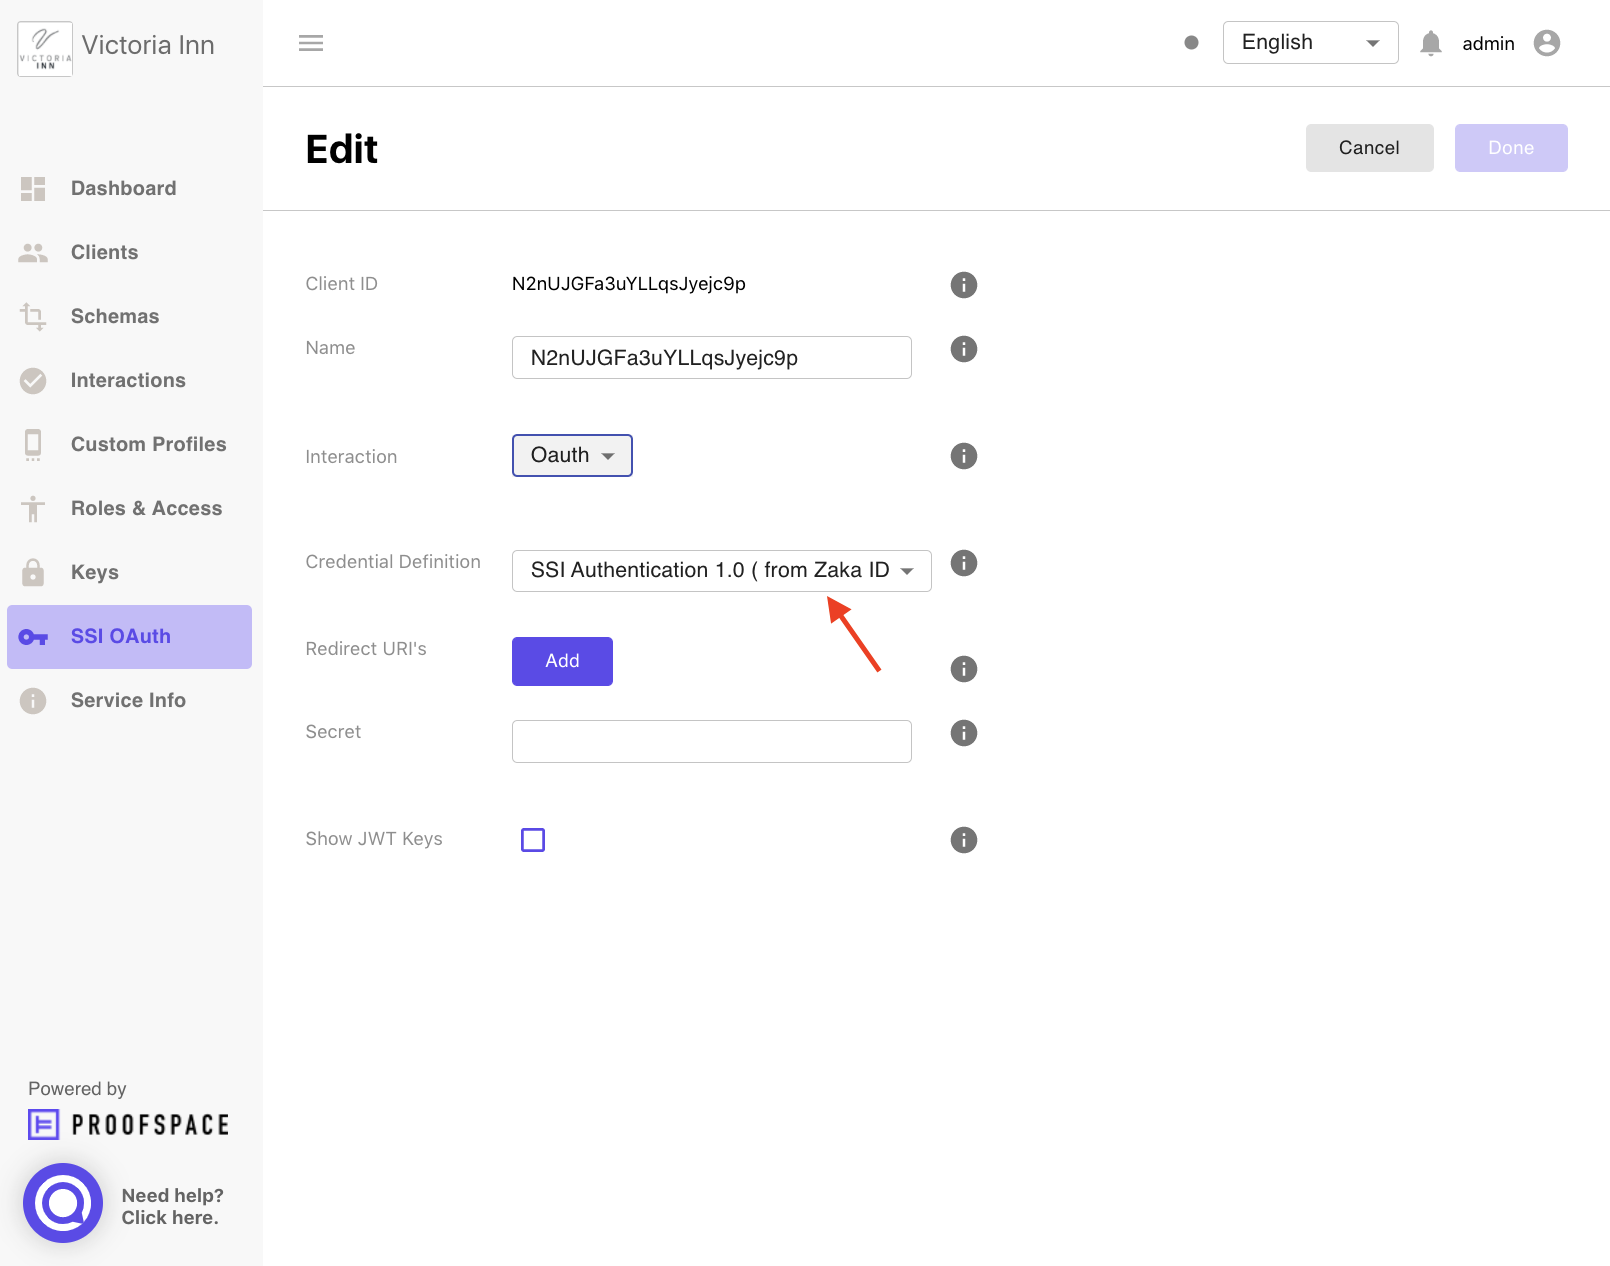 | ||
6. Enter the allowed URL(s) that will be used to verify the redirected URL from the authorisation call. | Allowed Redirect URLs | Enter the allowed URL(s) that will be used to verify the redirected URL from authorization call. | 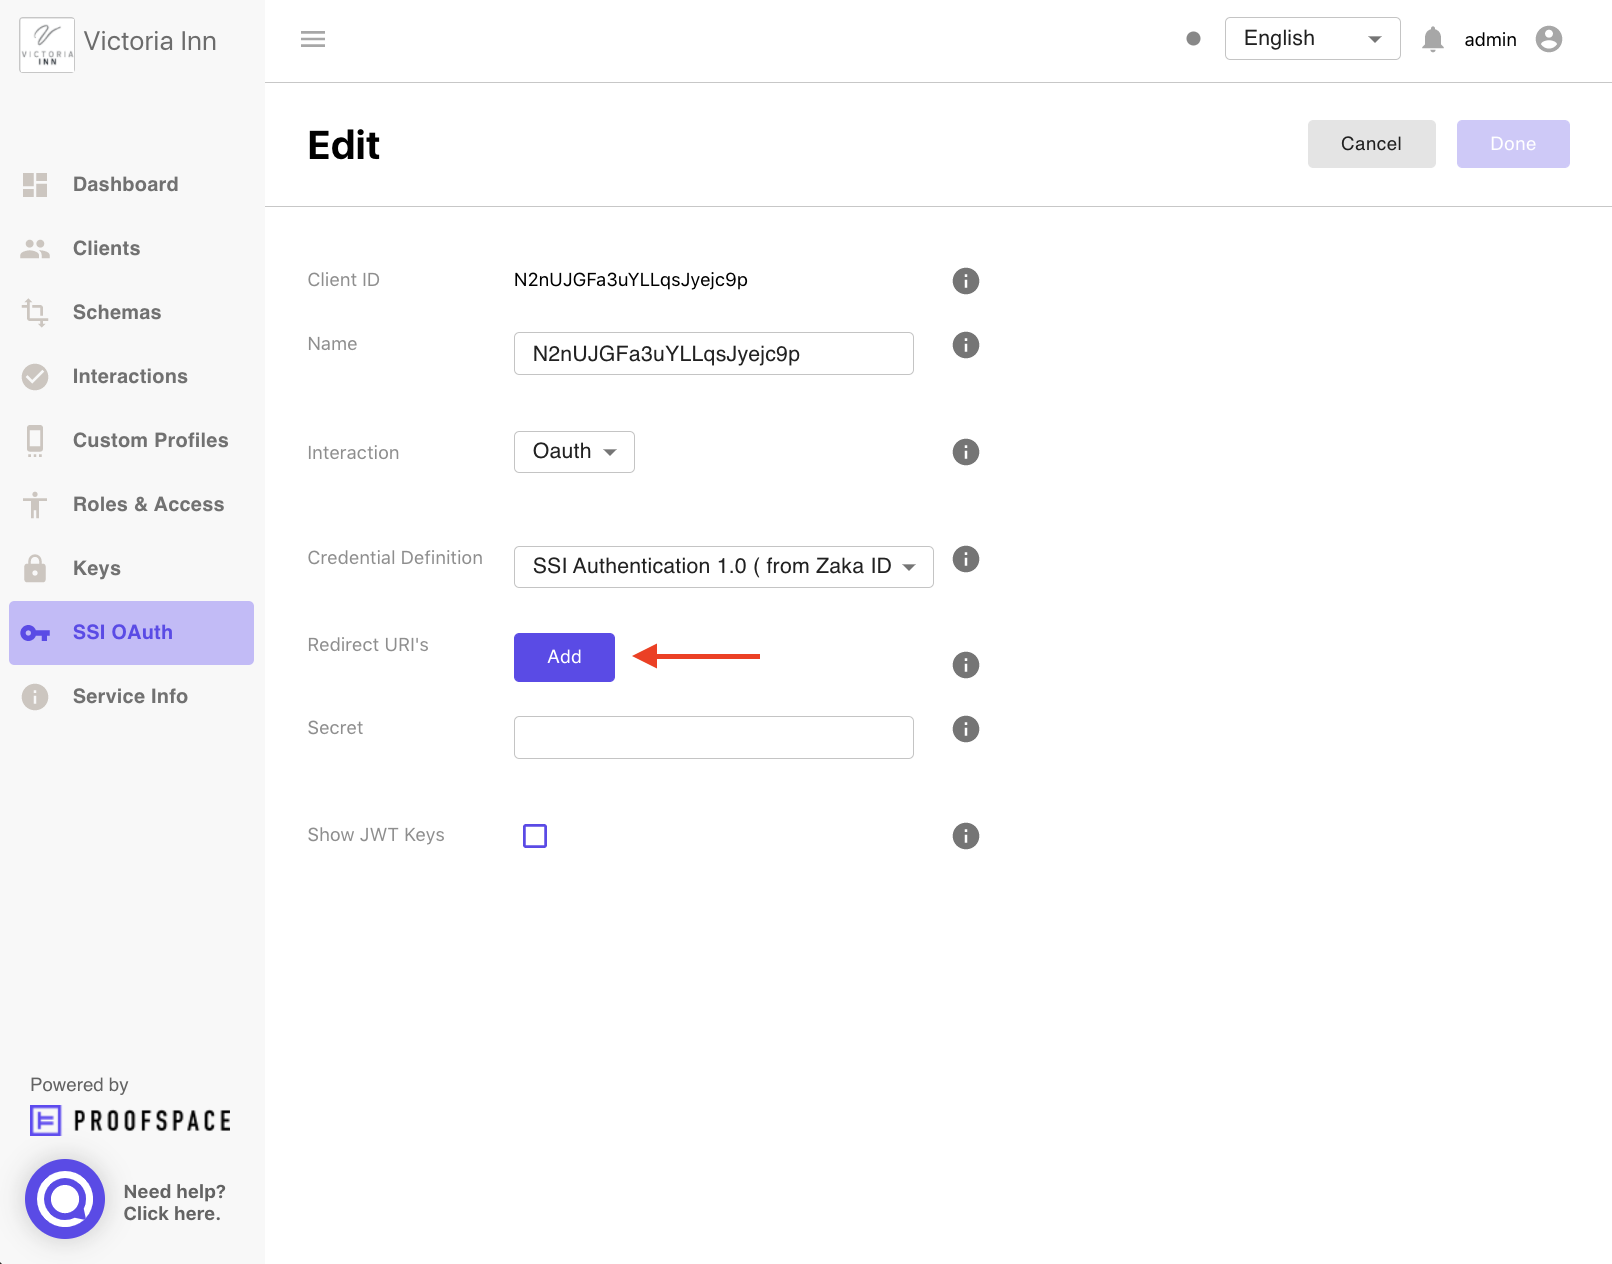 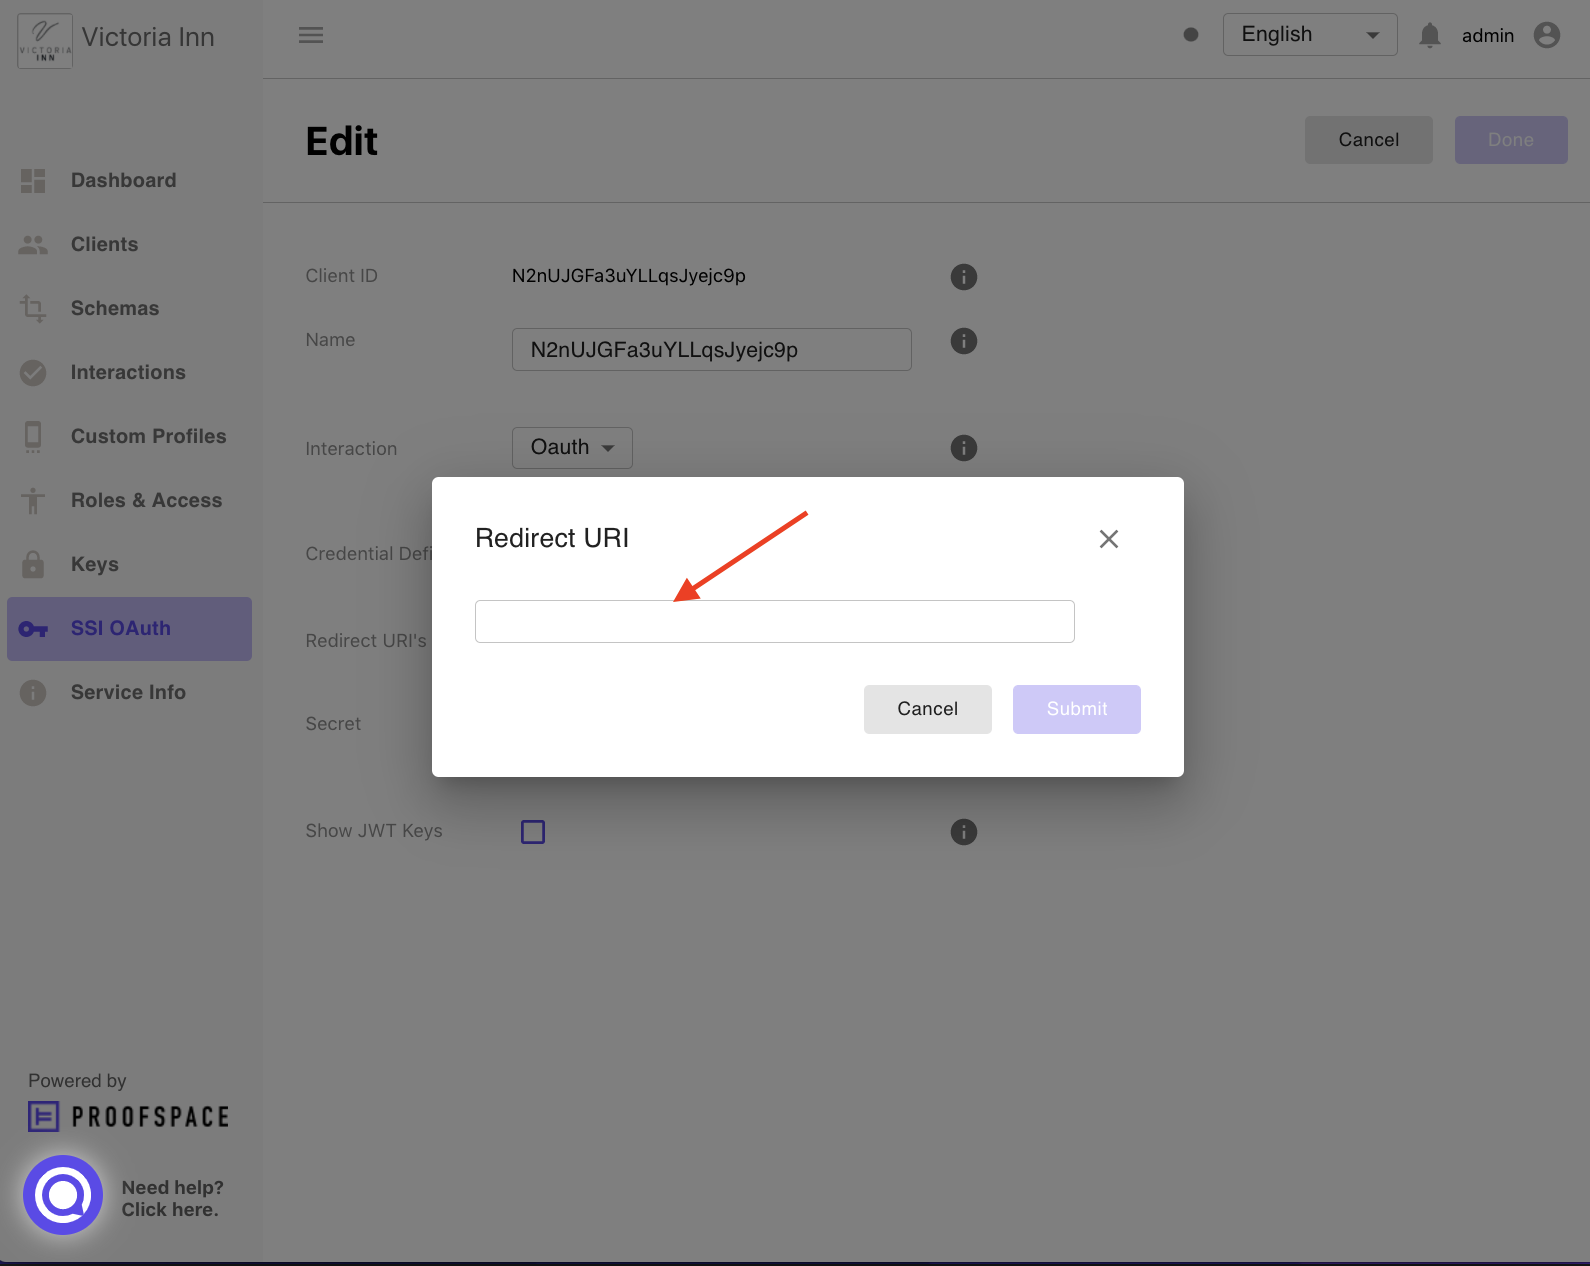 | |
7. JWT keys | Check the “Show JWT Key“ checkbox to enter and save private and public keys for signing and verification of access tokens. | 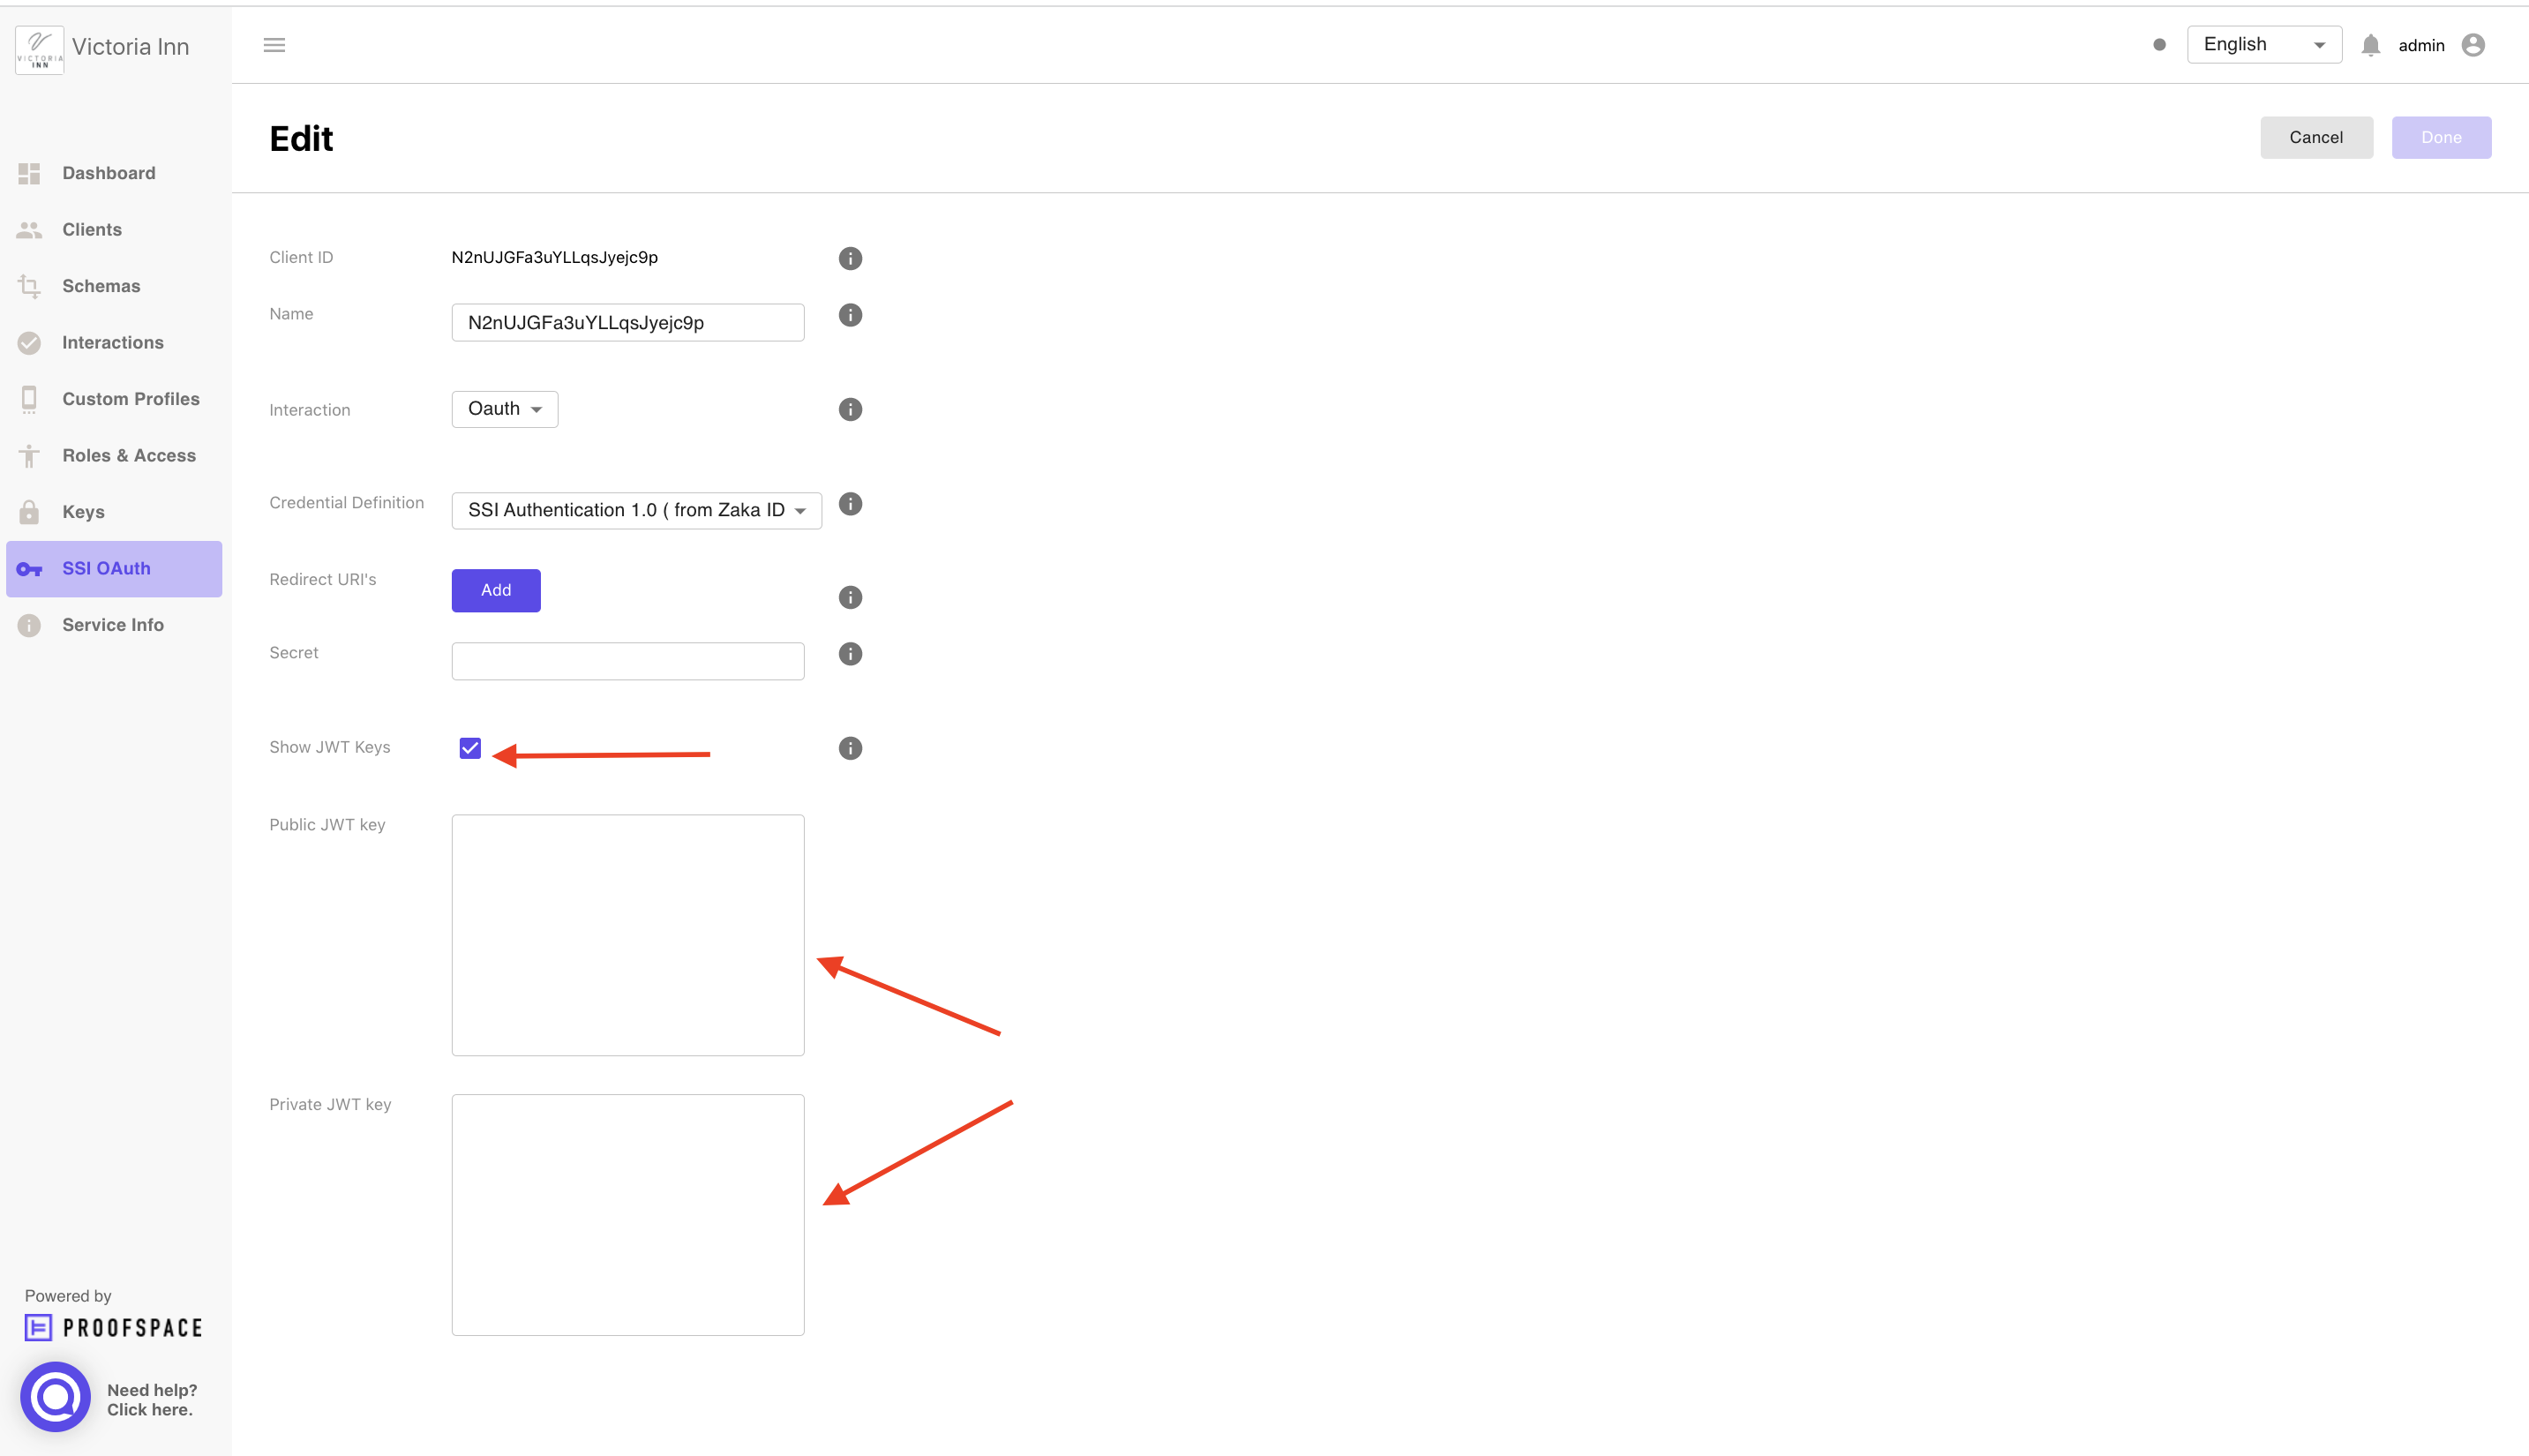 8. In the appropriate boxes, save private and public keys for signing and verification of tokens. 8. In the appropriate boxes, save private and public keys for signing and verification of tokens. |